Productivity tools
FILTERS & SEARCHES: How do I find what I am looking for ?
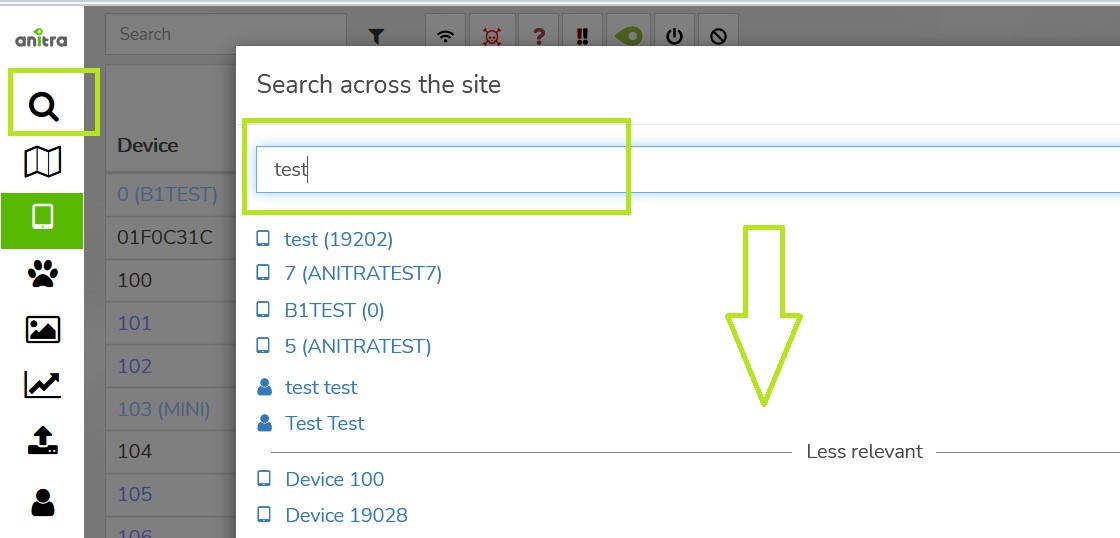
Various features helping user find and filter down what is needed are available in Anitra:
- Global full text search
- full text seach accross all the objects of various types which user has access rights to.
- a list of relevant item s sorted by relevancy is returned
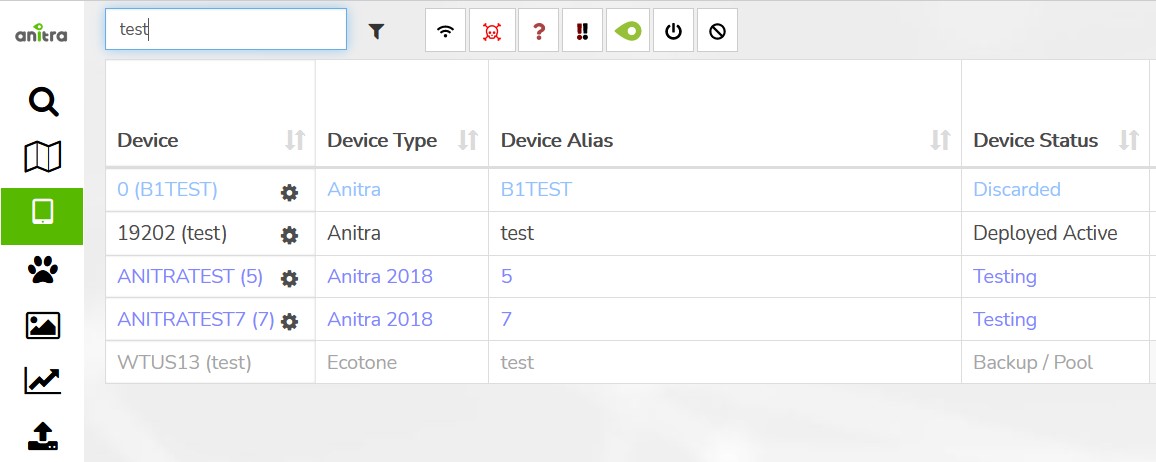
- Grid search
- seaches in important fields in displayed grid only
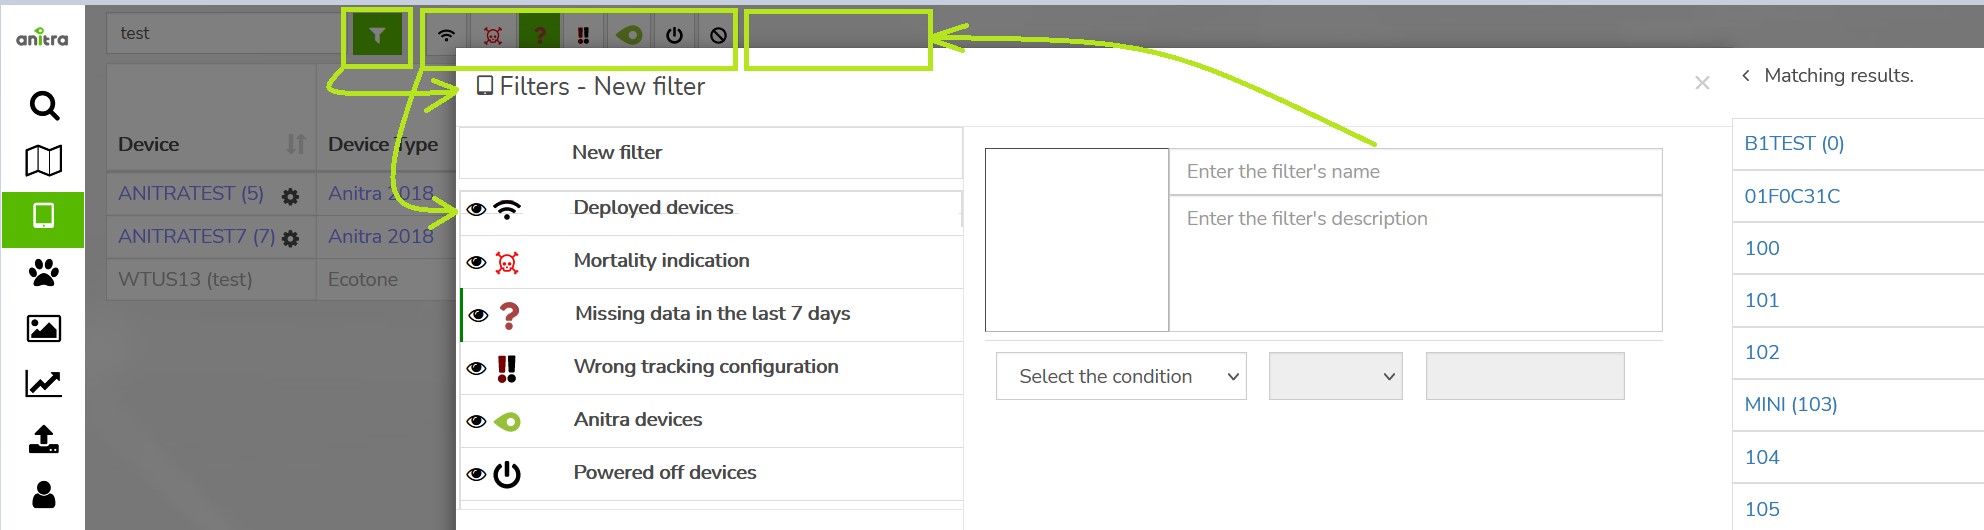
- System and Custom "Quick" filters
- allows quickly filter data using predefined "system" or "user defined" filters
- filters are available as icons on top of the device or tracking grid header line
- custom filters can be created in "Filter manager"
-
Published map filters
-
Filter manager
- Customized quick filters that filter devices according to specified criteria (e.g. Device list, Name fields, Device notes..), you can set multiple criteria at once
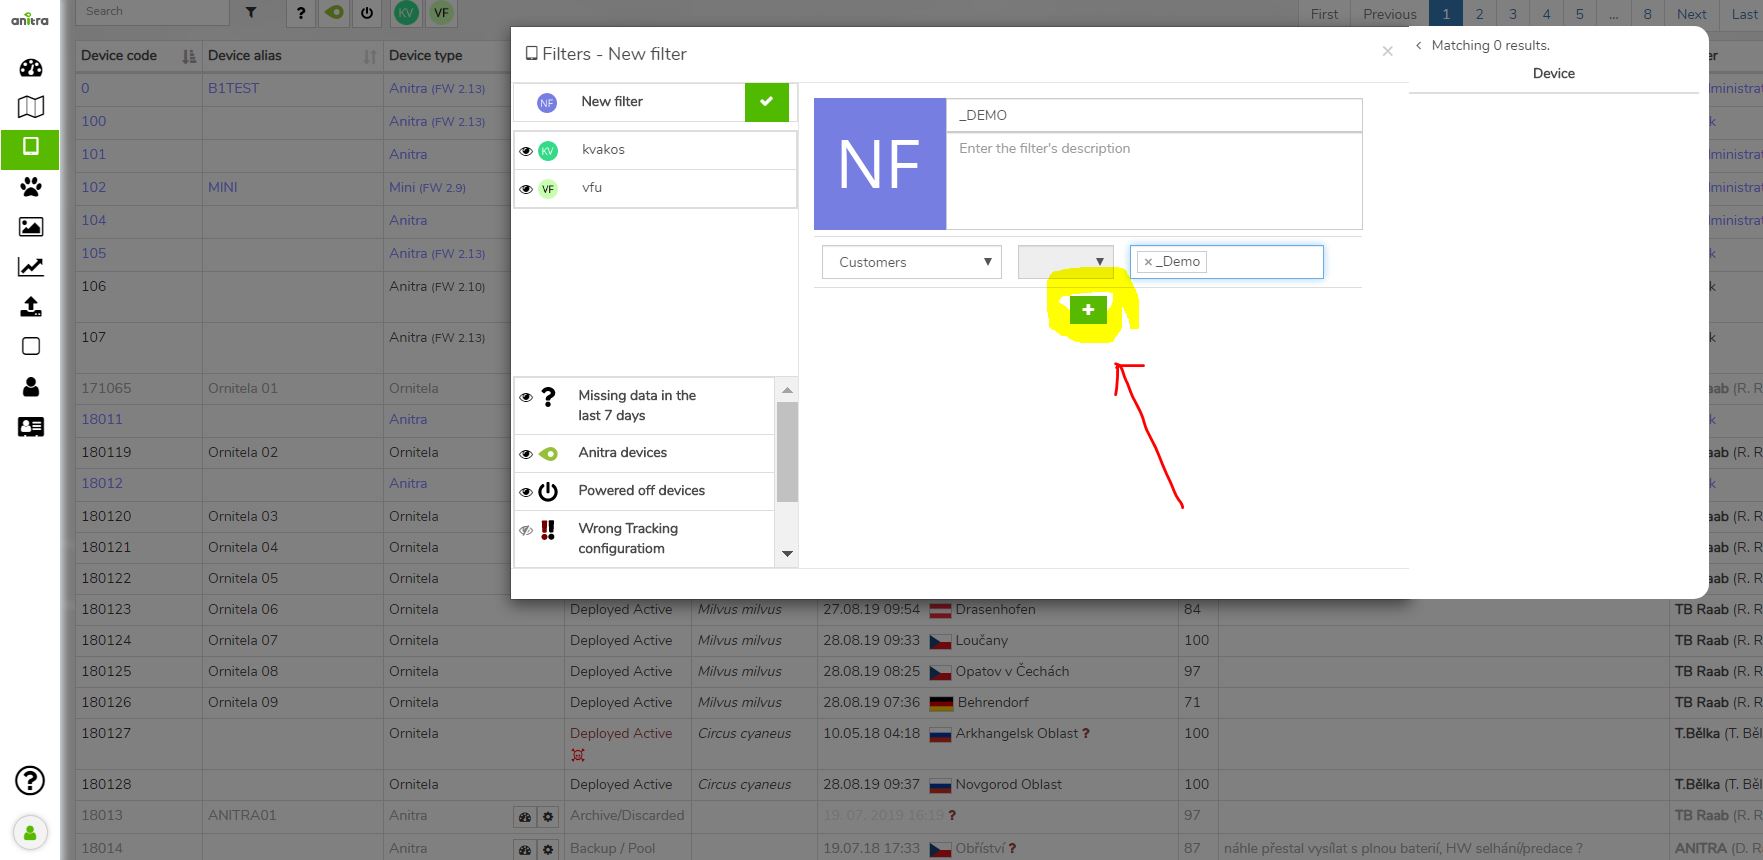
- You can save your customized filter with the green "check" icon
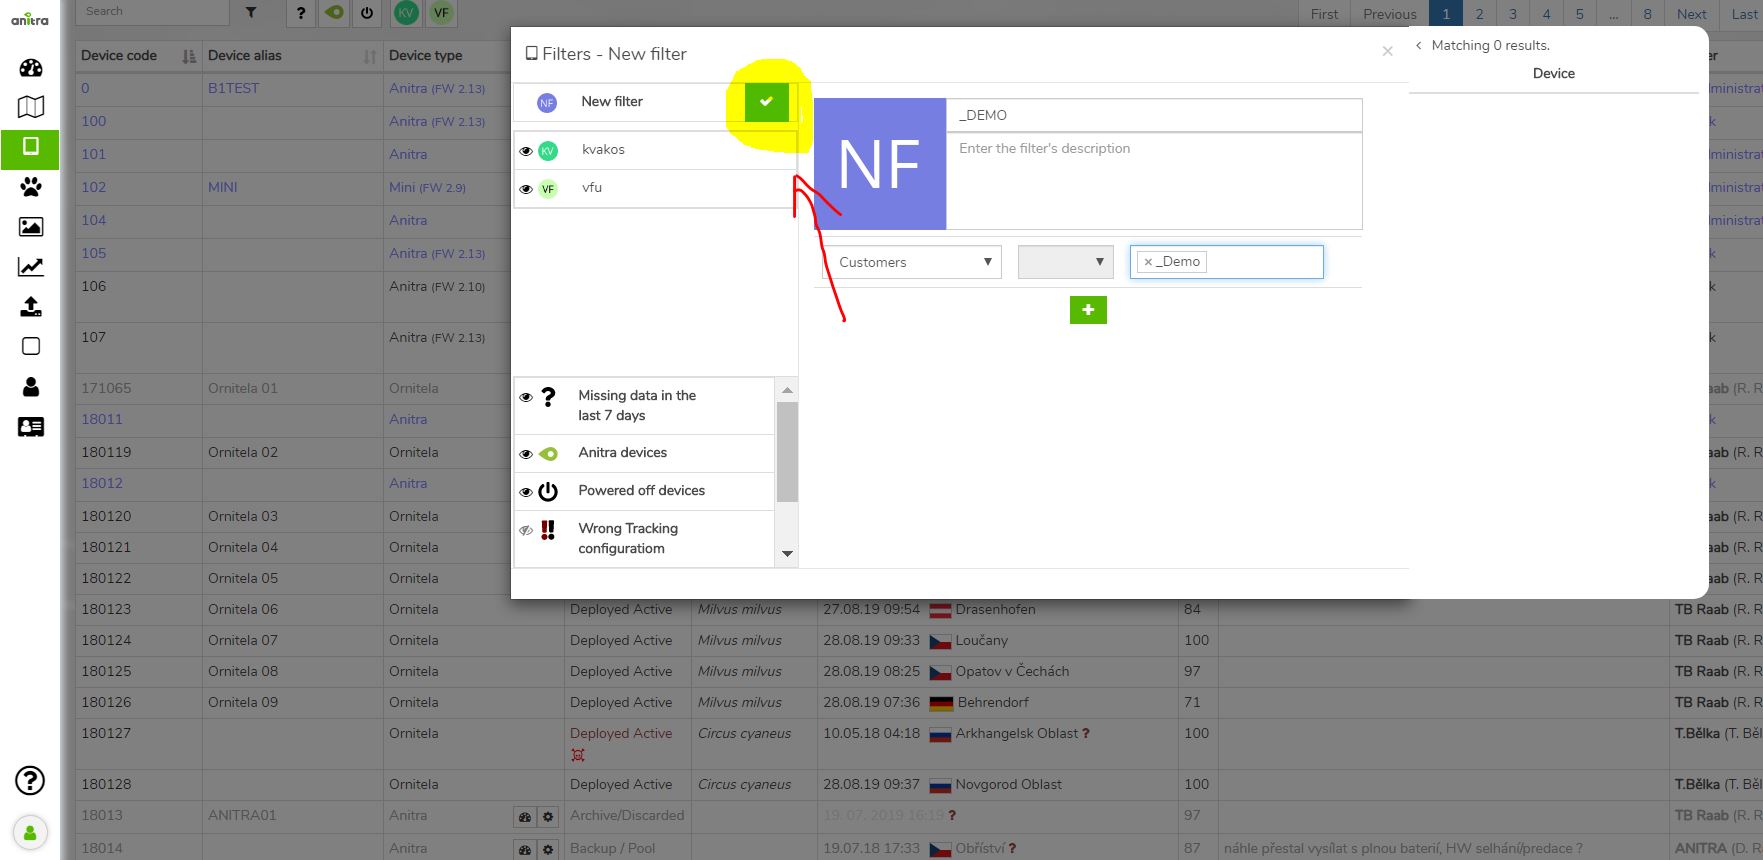
- "Eye" icon enables to pin the particular Quick filter into the Quick filter panel next to the Search box
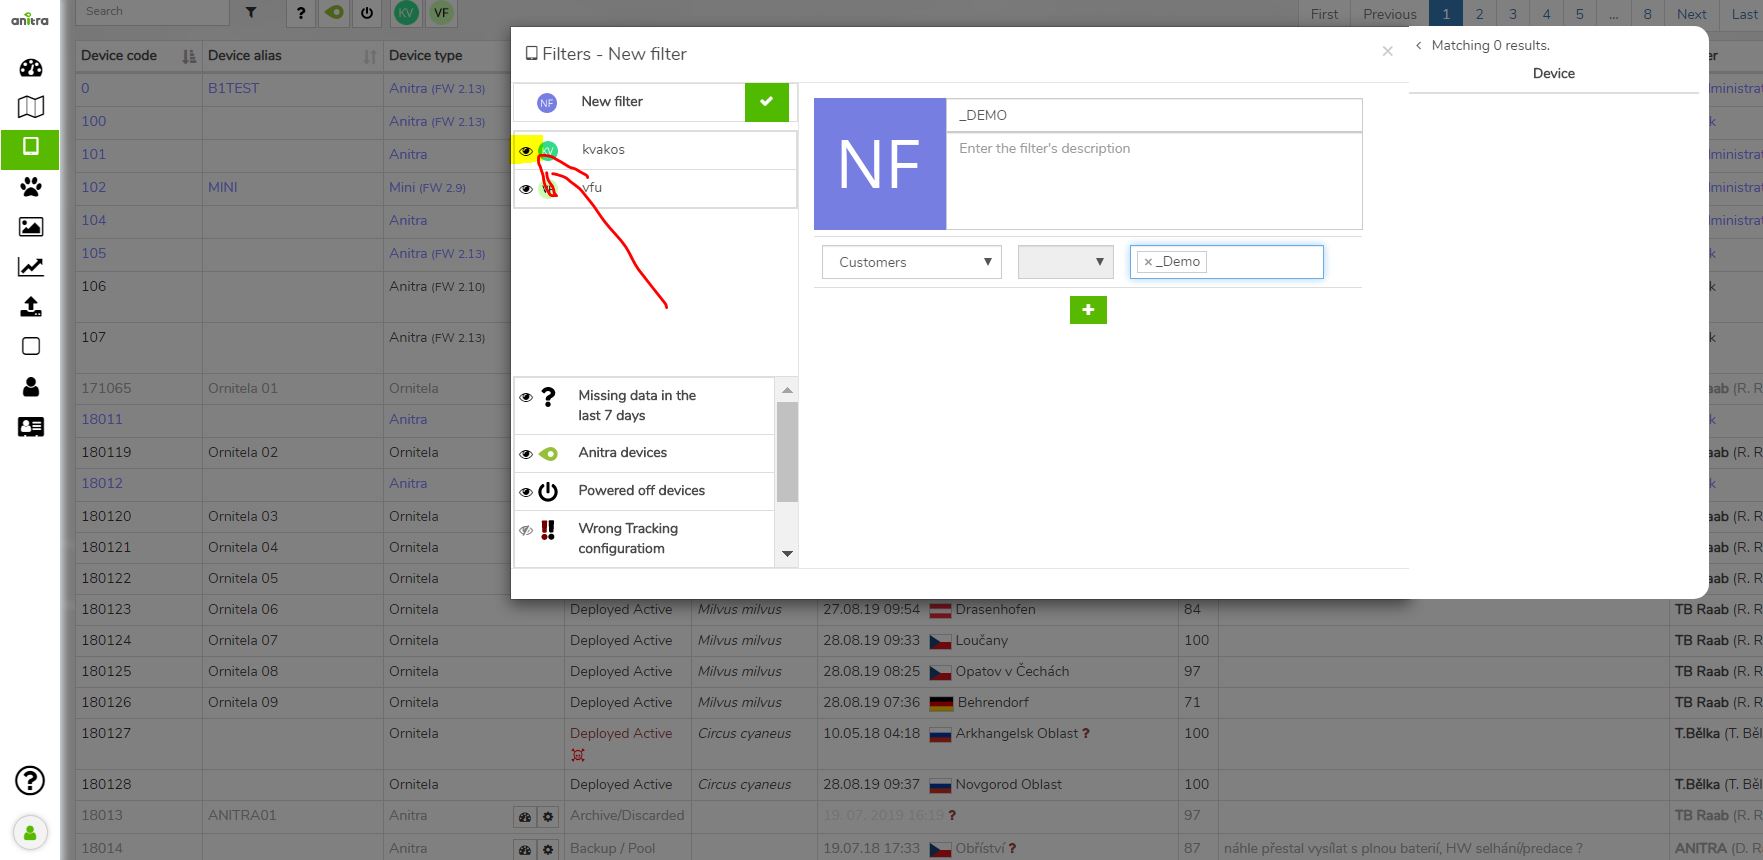
- Customized quick filters that filter devices according to specified criteria (e.g. Device list, Name fields, Device notes..), you can set multiple criteria at once
- Filter functionality: allows filtering your trackings by criteria
- Predefined quick filters, which cannot be modified (Mortality Warning, Last data warning only, Anitra devices only)
- Customized quick filters, which filter Trackings by set criteria (e.g. Tracked Objects, Name fields, Note fields..), you can set multiple criteria at once
- You can save your customized filter with the green "check" icon
- "Eye" icon enables to pin the particular Quick filter into the Quick filter panel next to the Search box
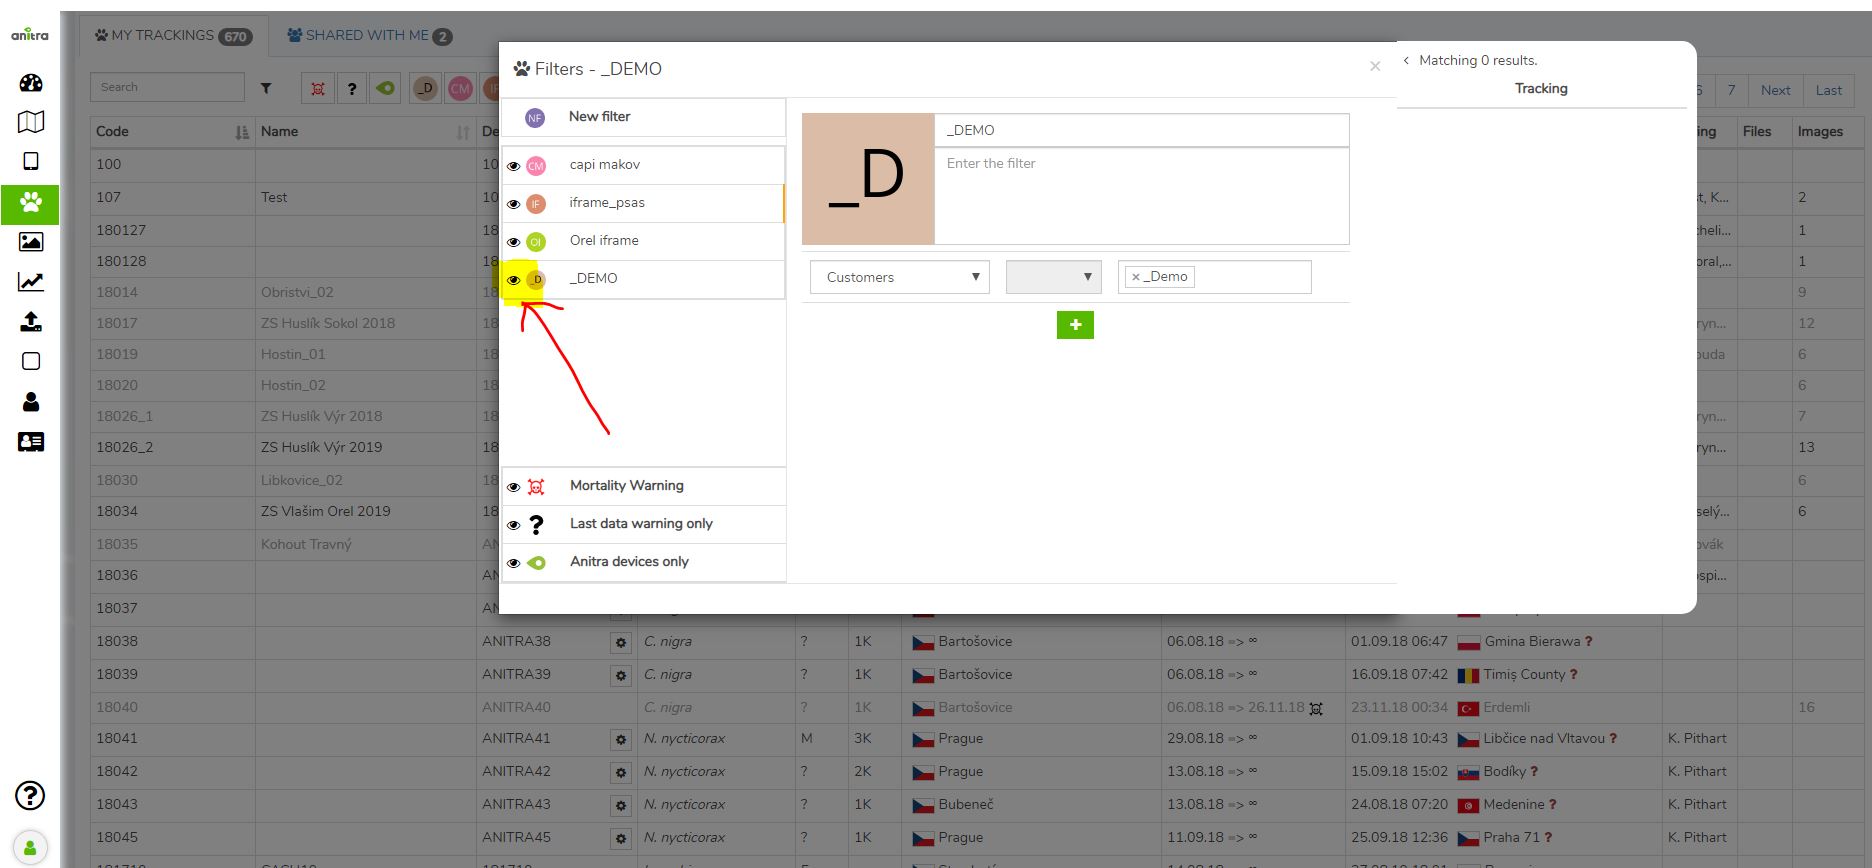
- You can turn on multiple Quick filters at once in the Quick filter panel
NOTES: Where to note down info about particular things?
A handy feature helping users to get organized and stay organized with their data.
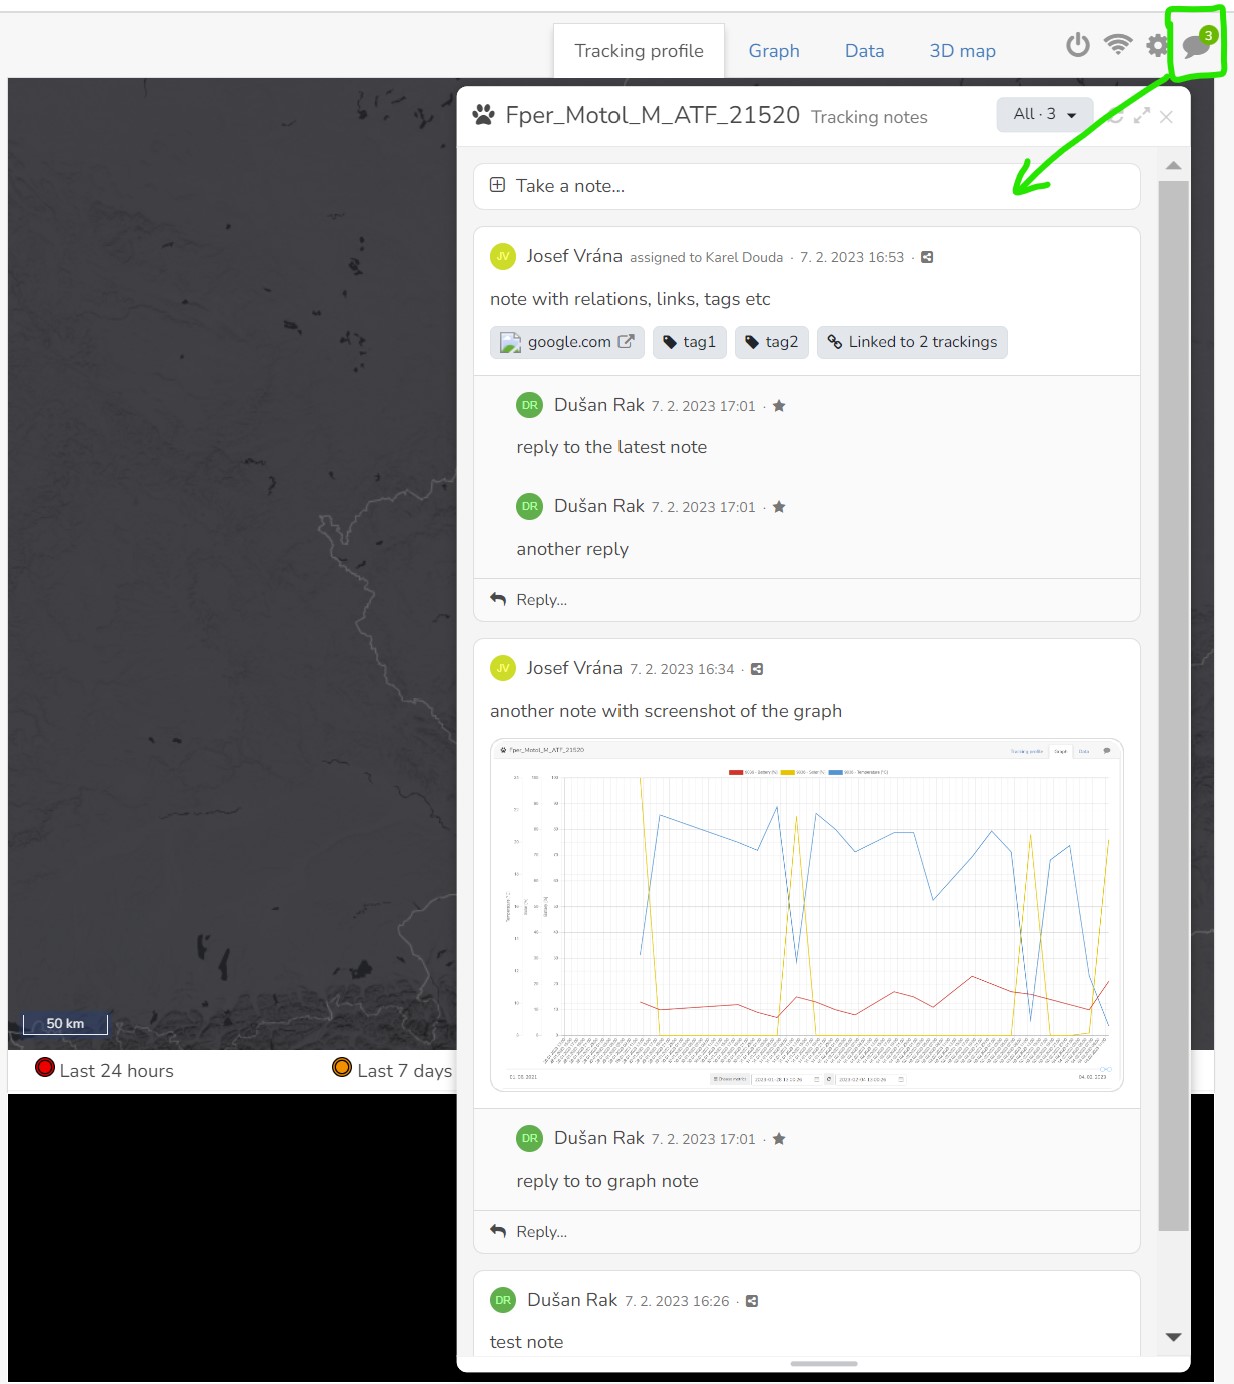
Available for multiple entities (Devices, Trackings, Animals, and Customers/Organizations)
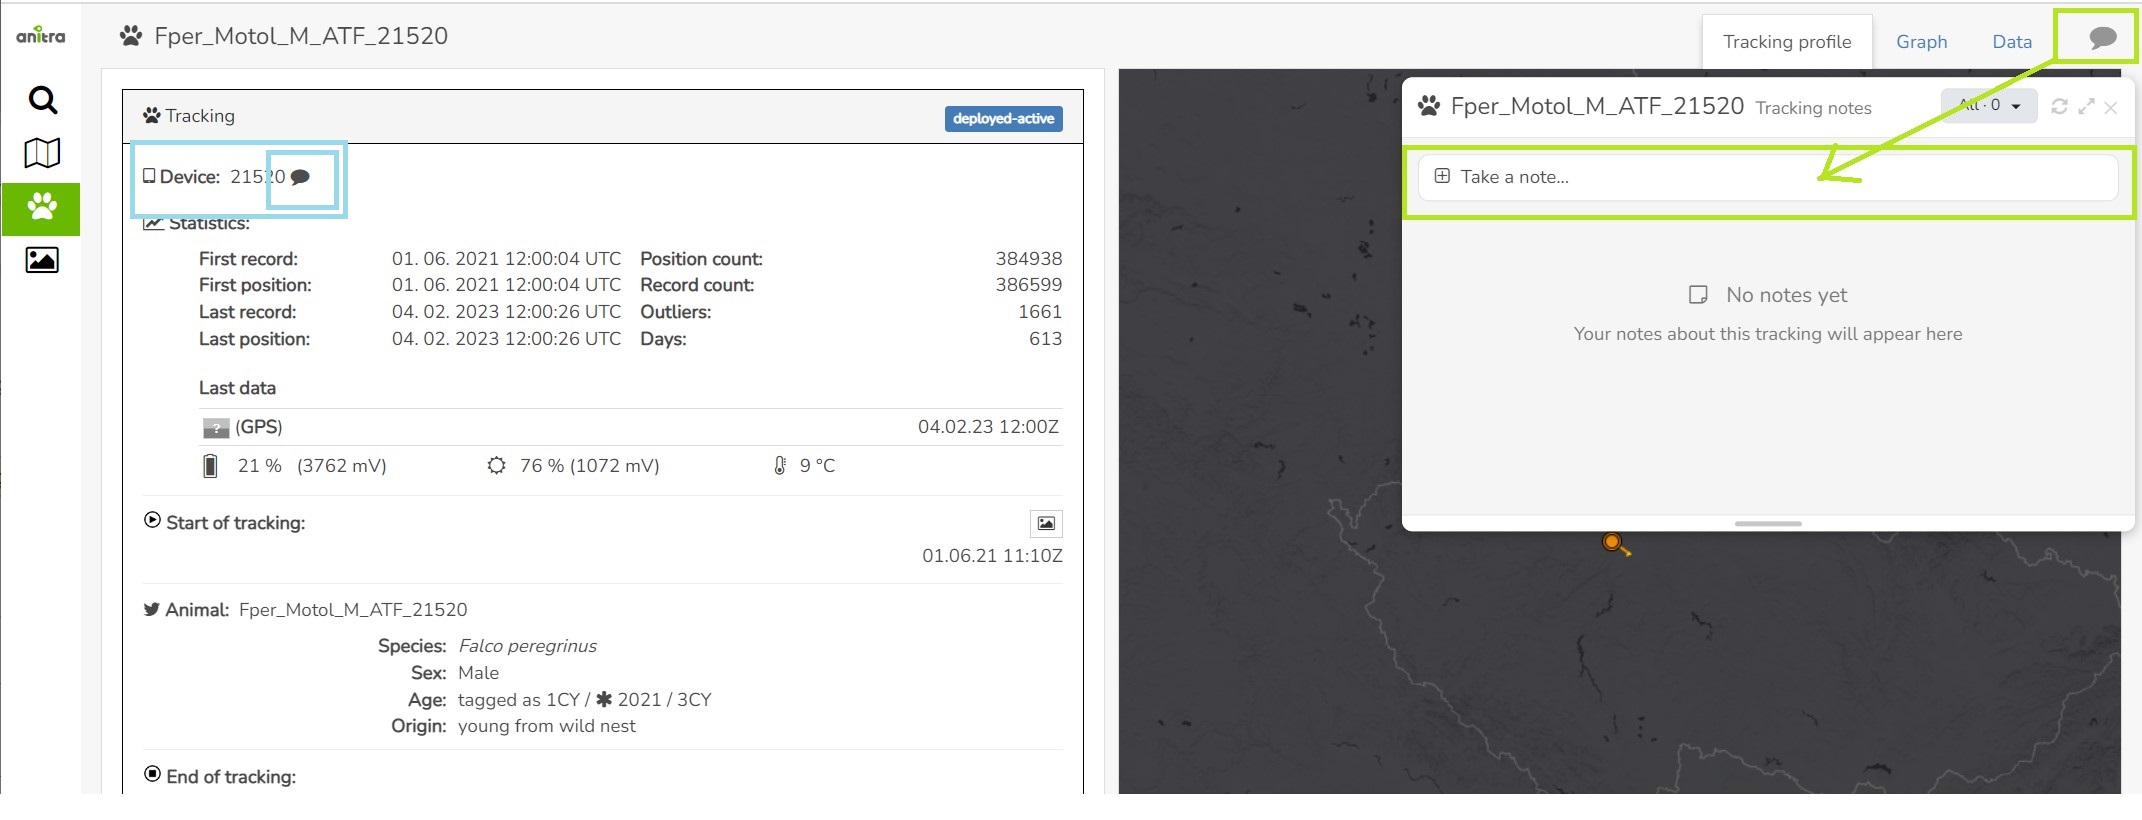
Note threads can be accessed
- from entity profiles - in the green shown opening of the Tracking note, the blue mark on the right shows the place to access the device note
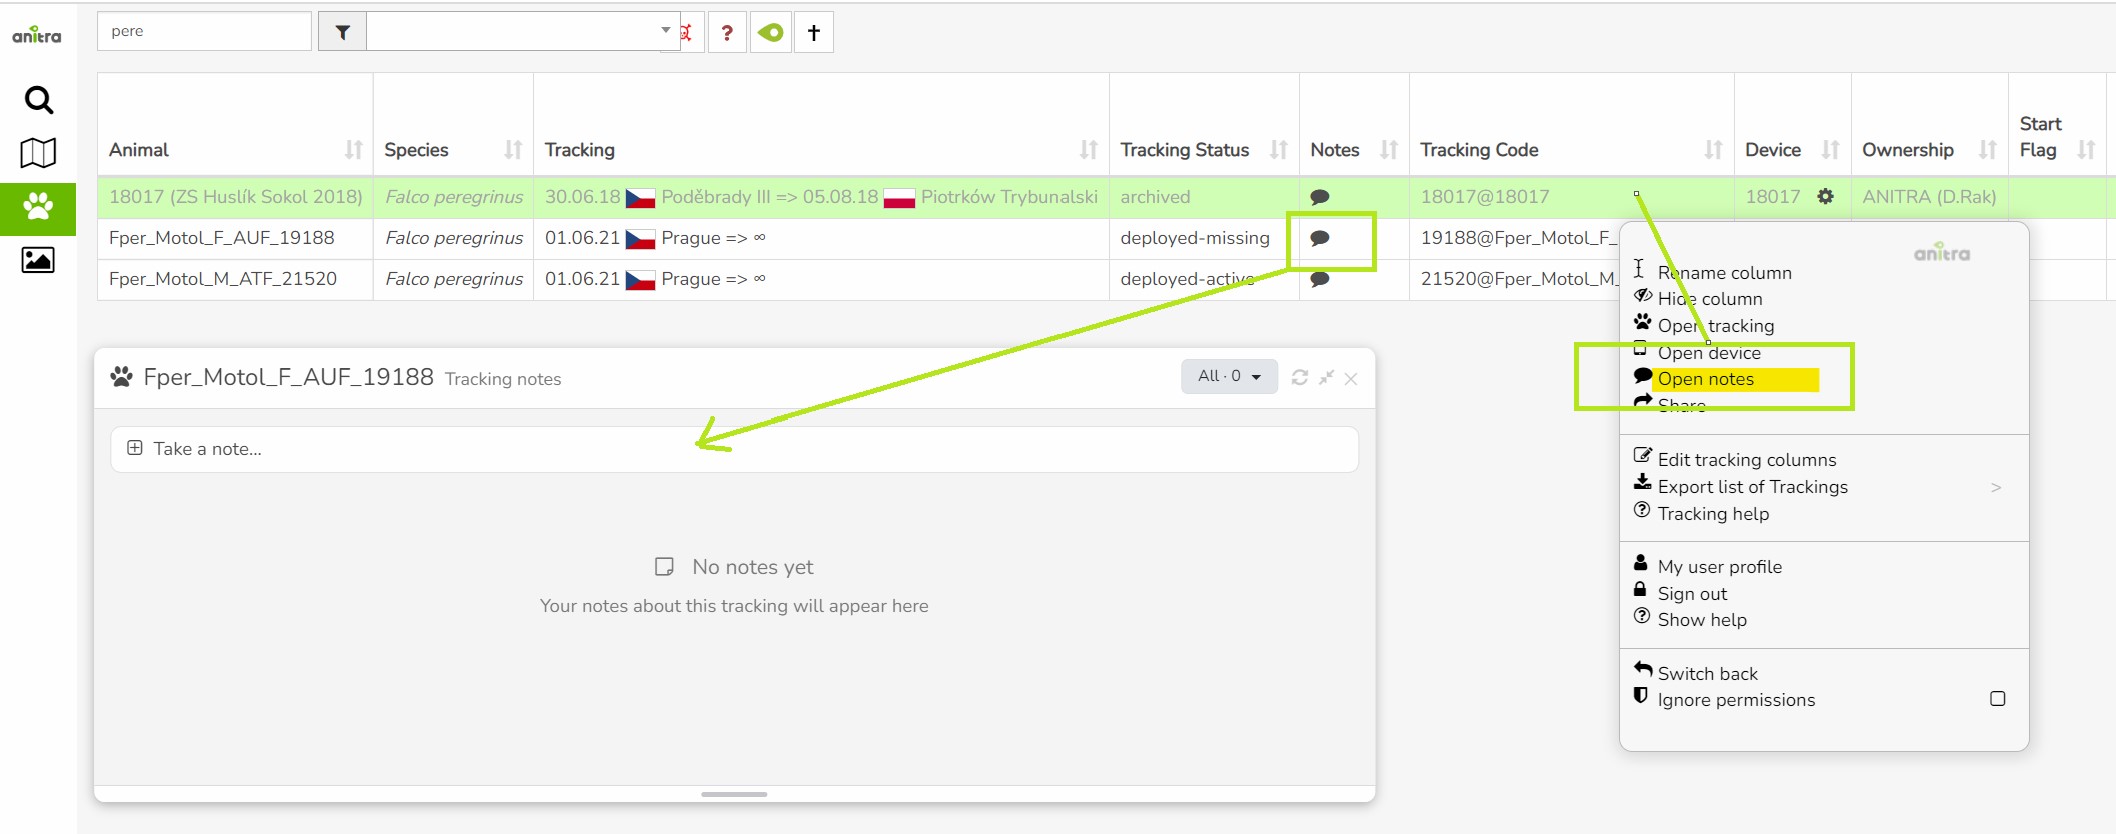
- entity lists or using the context menu - either click on the note icon in the Notes column or use the context menu over the desired row
- from user Task List
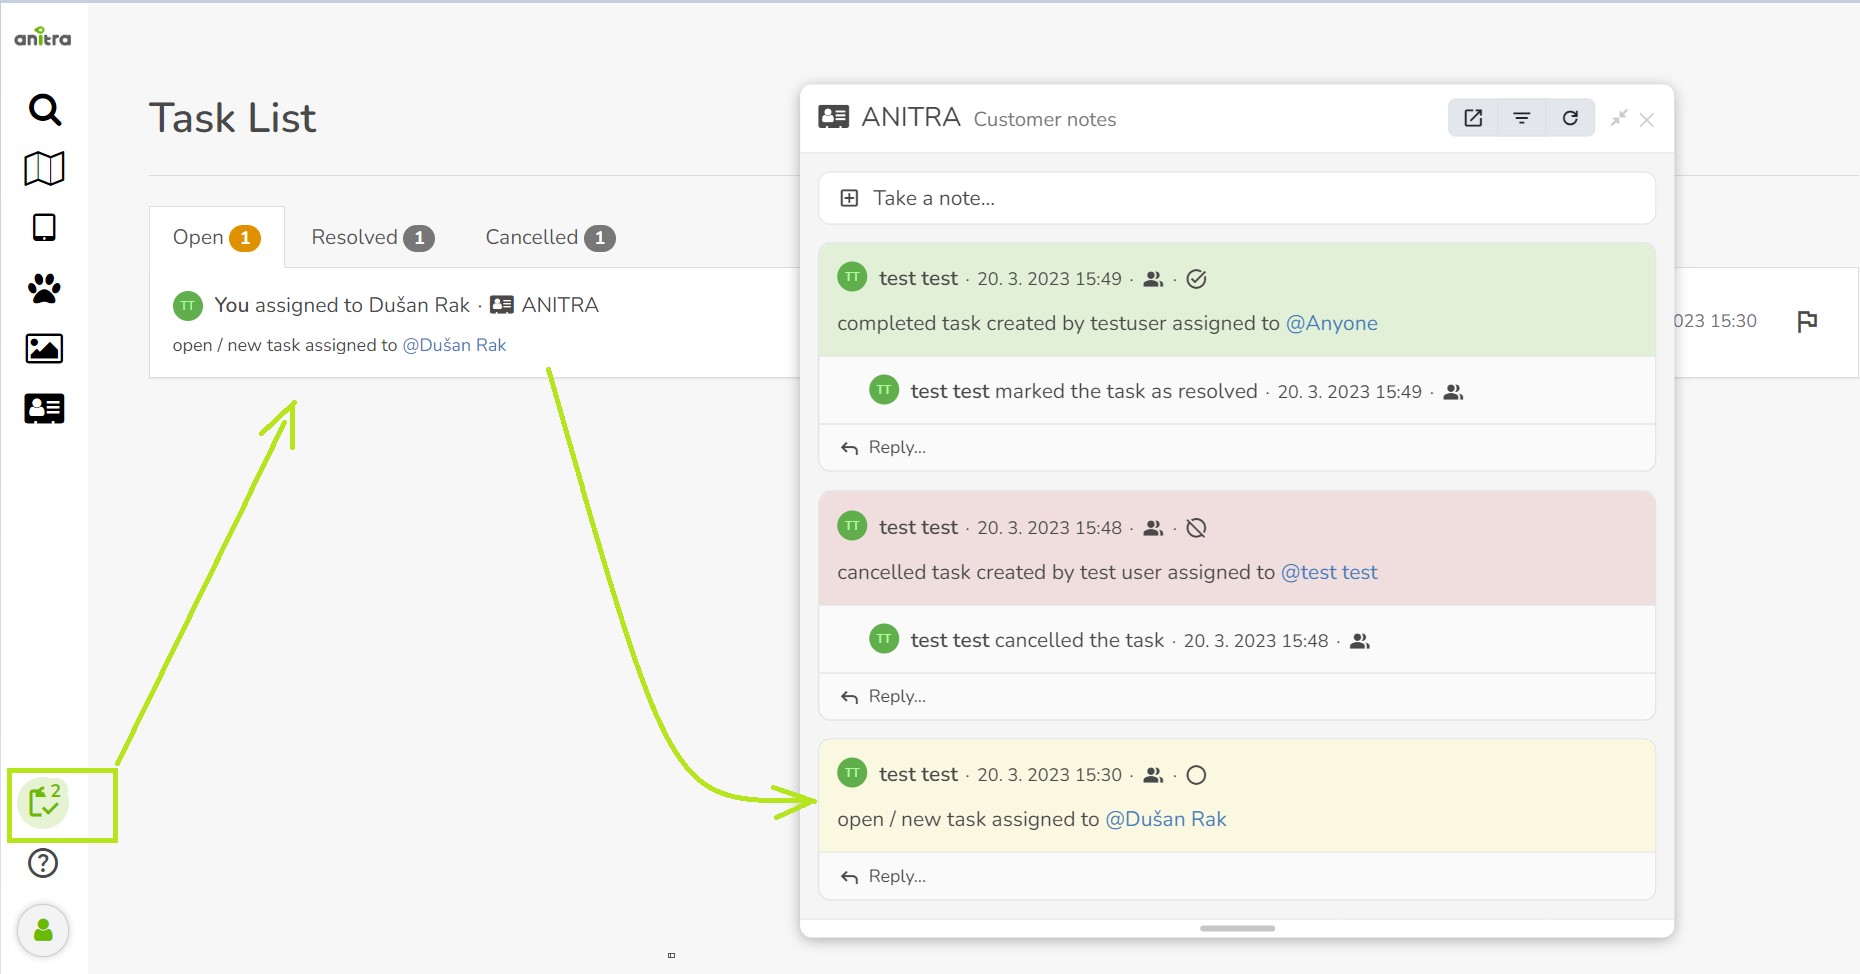
Here a new note can be created, existing notes can be edited, or a reply to previous notes can be posted.
The thread window is flowing over the entity. It can be open parallel to whatever you do in your profile. You can switch tabs, type forms, take screenshots while browsing, or even create/edit notes.
Create the note simply by typing in the form
Edit existing notes by double-clicking them or using "more" or "Edit" icons in the right top corner. This switches note into "edit" mode
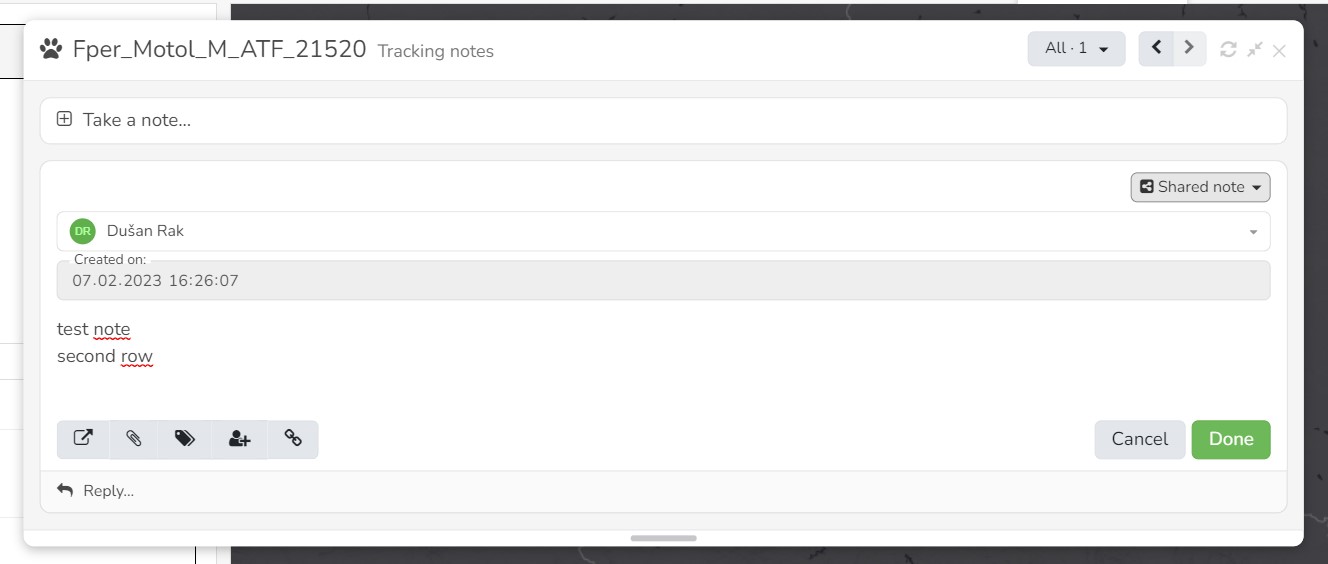
Save the new or edited note by clicking the "Publish/Done" button or simply hitting ENTER.
While creating or editing you can cancel by the "Cancel" button or using ESC on your keyboard
The note text does not allow formatting but you can structure the note to more rows. Use SHIFT+ENTER for the new line (as ENTER is reserved for the "Save" operation)
An existing note can be deleted using the "more" button >> "Delete thread". Note while deleting the parent note all the replies will also be deleted.
"Clone note" function - particularly useful e.g. for fast duplicating of notes with complex definitions (i.e. notes linked to many items).
- While cloning notes attachments are removed (not cloned with the note).
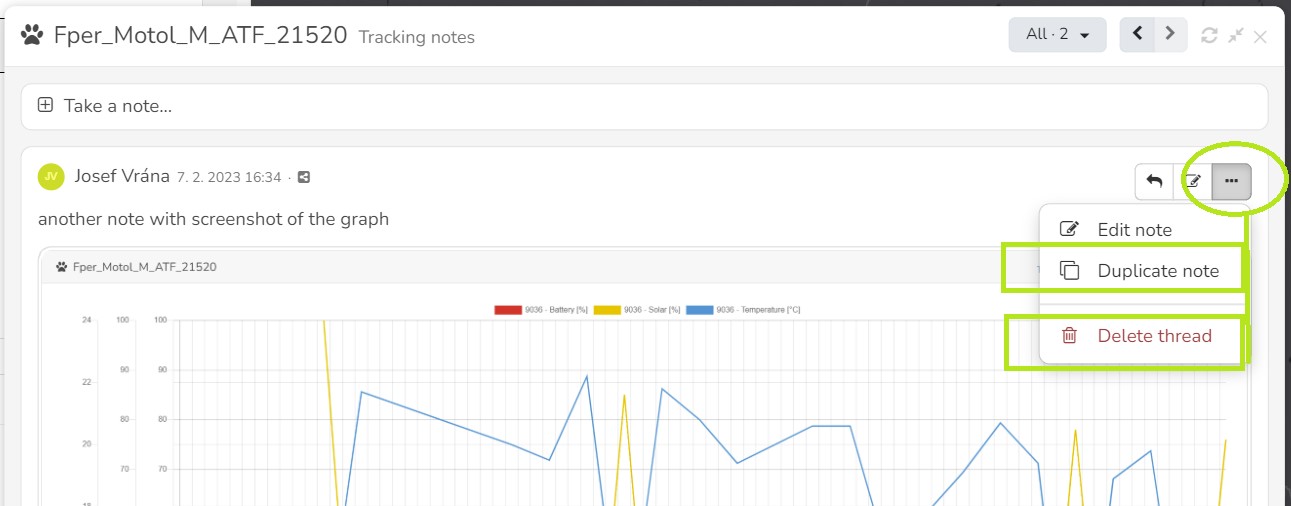
Use "Promote to parent note" when you need to convert a note reply to a top-level parent note.
- While promoting reply to note it inherits the relations from its original parent note
Use "drag'n'drop: action to move one note into the reply area of the other note to move and transform the note into the reply.
- Converting note into reply is only possible for notes created by the user himself and only to notes that have no complex relationship
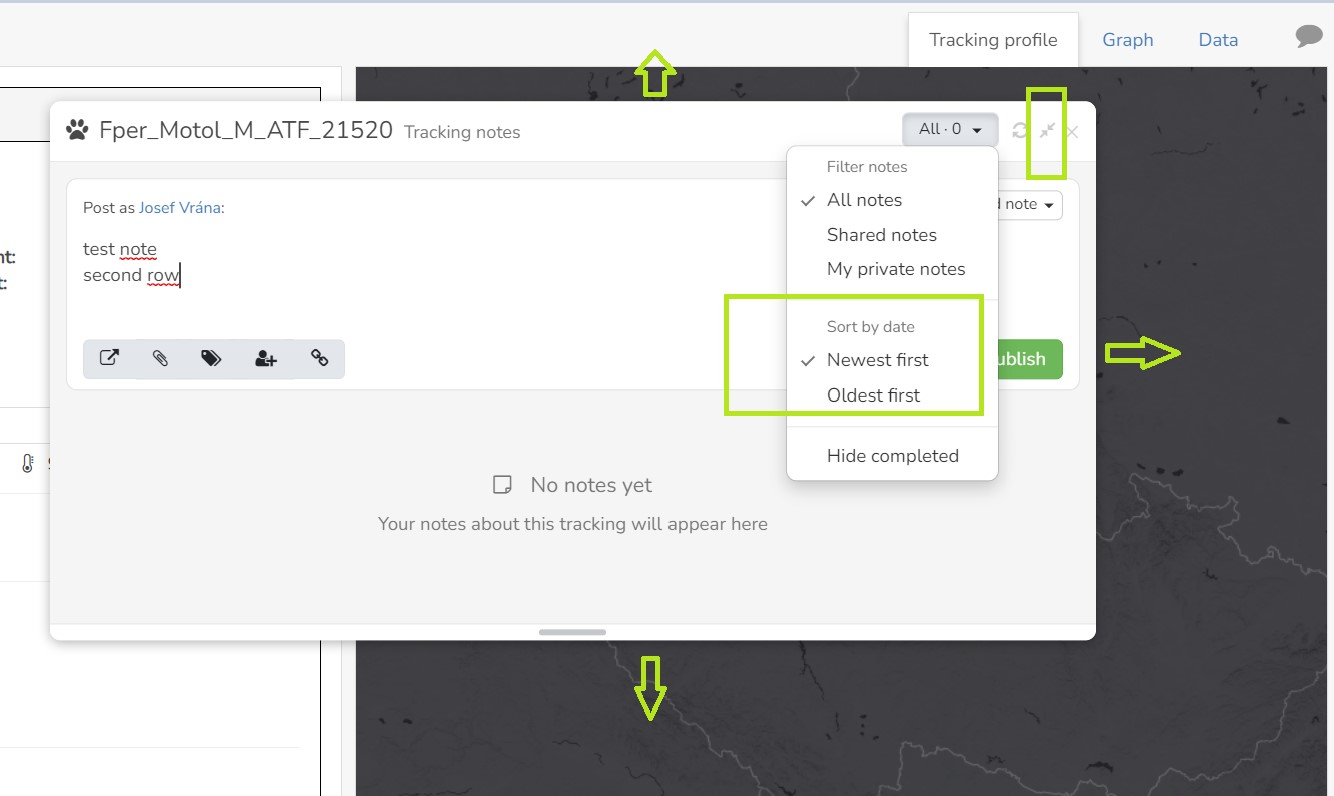
By default the note thread is
- sorted starting with newest notes up. You can invert the sort order to have the oldest notes on top of the page. This setting is remembered in your user preferences.
- positioned on the top right side of the page. You can modify the position by dragging the floating window to any side, This setting is remembered in your user preferences.
- sized to one-third of the screen width. You can switch the window size between one-third and one-half by the "shrinking/stretching" button. This setting is also remembered in your user preferences.
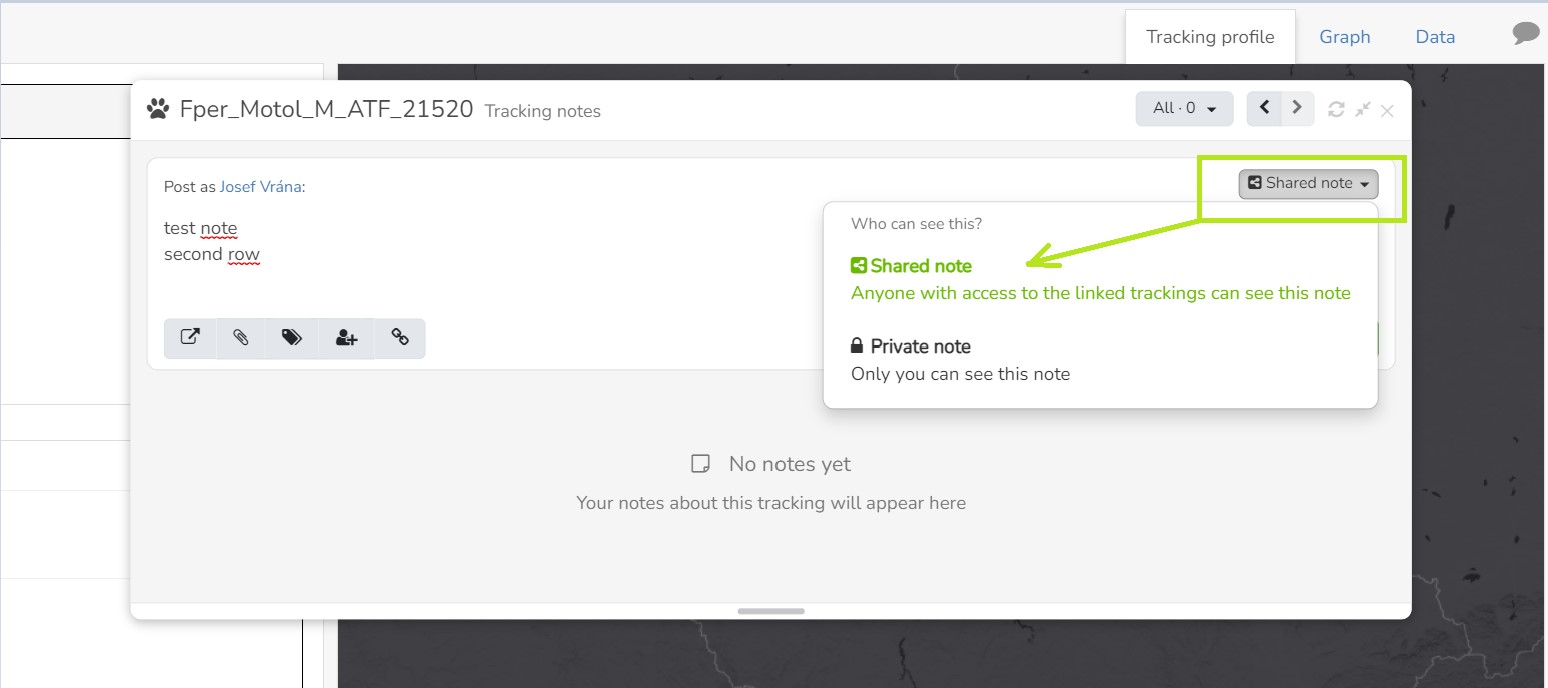
Notes can be saved as
- shared - will be visible to all the users with access to the entity. a way to share knowledge, tasks, and the status of particular items
- private - will be visible only to the author of the note. a way to note down things or ToDos only for the author
The functionality contains a complex toolkit covering
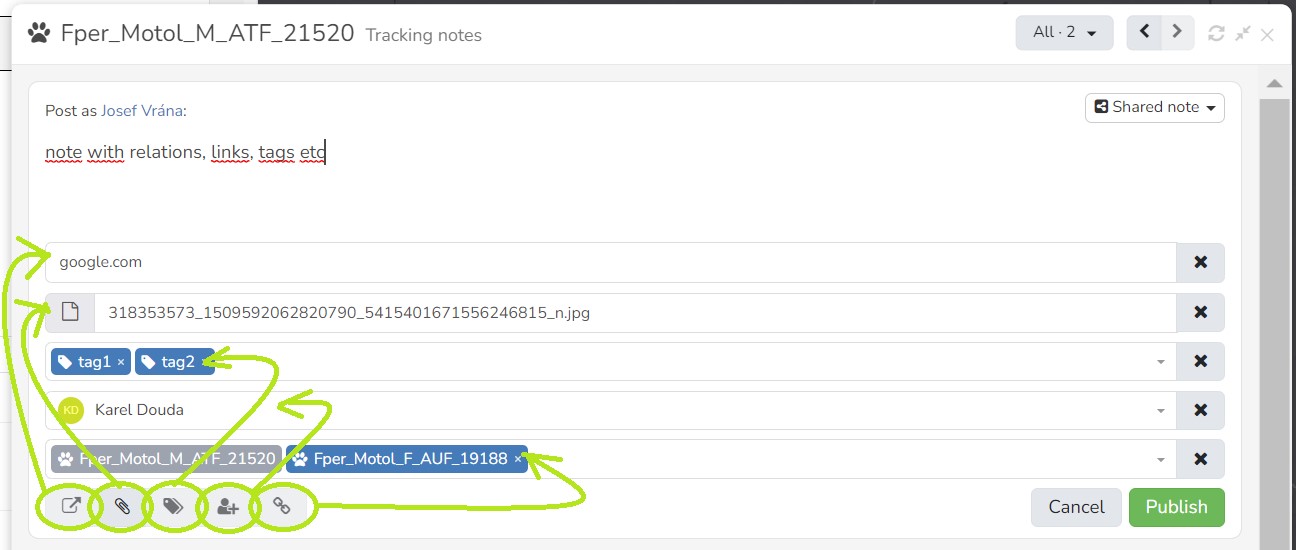
- relations - a single note (thread) can be linked to multiple items of the same type (e.g. a single/shared note linked to 5 devices)
- attachments
- To each note or reply, one or more attachments (e.g. pictures) can be attached (by browse function or using drag 'n' drop)
- Picture attachments are then previewed in the thread, photos can be opened in full size and browsed as a gallery
- screenshots
- For adding a screenshot from the clipboard just press CTRL+V (paste) while in the note body.
- This will append the screenshot similarly as it was a regular attached picture file. Note you can modify the screenshot file name as well.
- links/URL
- tags - you can label your notes by using user "tags", later you can search, filter, or group by these tags
TASKS (TODOS): Where to note down reminders and ToDos ?
Extension of the Notes functionality
By assigning a note to someone (to another user, to user himself or to anyone) the note is transformed into the Task (ToDo)
Use the button below the note editor or simply type @+name to assign the note as a task to someone
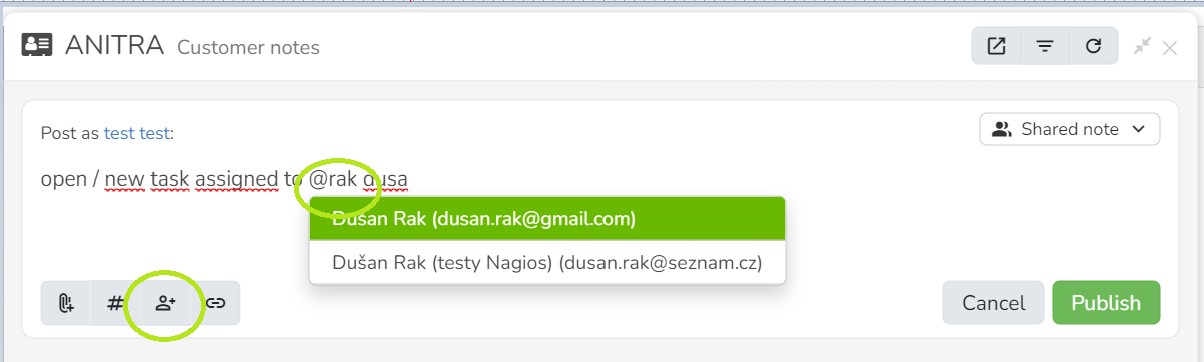
- assigning a task to another person (@other.person) will list the task in the other person's Task list (as created by you).
- assigning a task to yourself (@your.name) will list the task in your Task list (as created by yourself).
- assigning a task to anyone (@anyone) will create a shared task displayed to all the people with access to the linked entity (e.g. particular device, tracking, or customer)
A simple workflow for tasks exists - the task can be in one of the three states
- new/open (= to be completed, highlighted by yellow background)
- completed /done (= marked as completed, highlighted by a green background)
- canceled / rejected (highlighted by a reddish background)
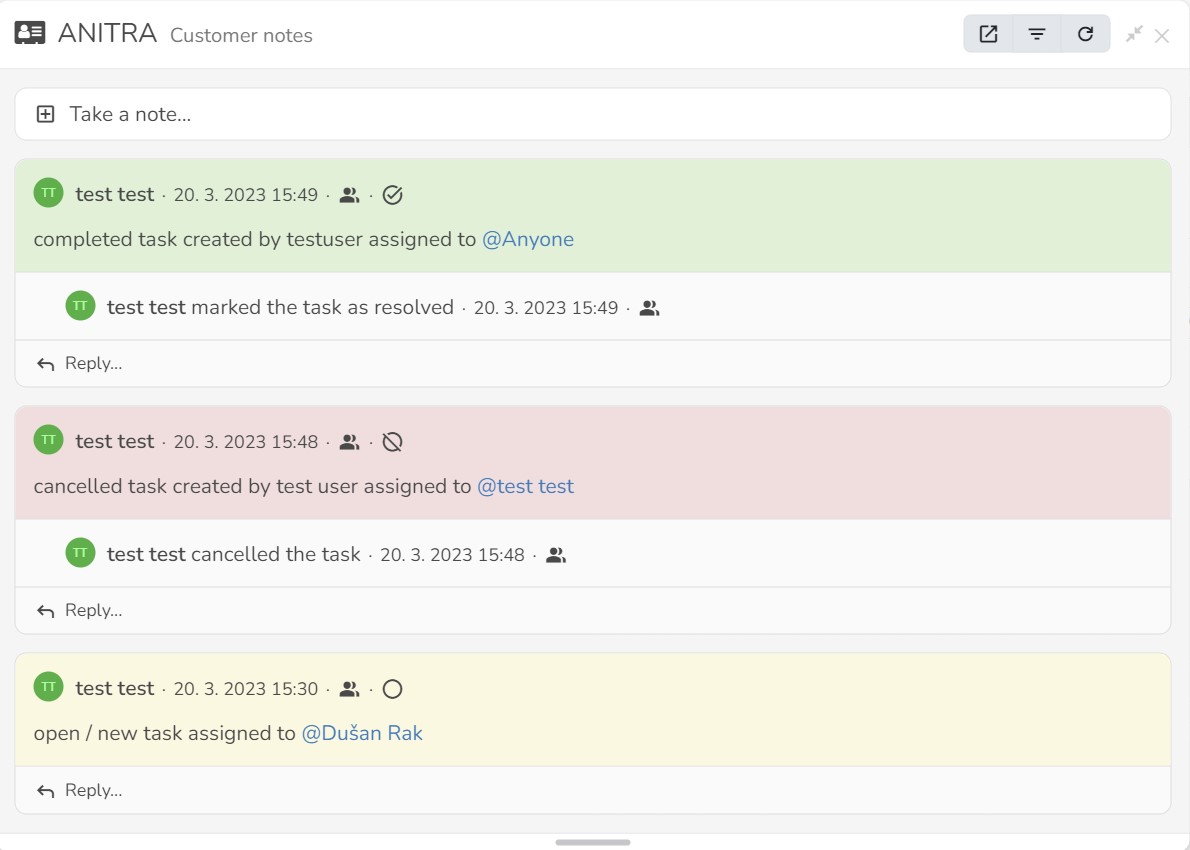
Users can move the tasks between the states using icons and controls in the right corner
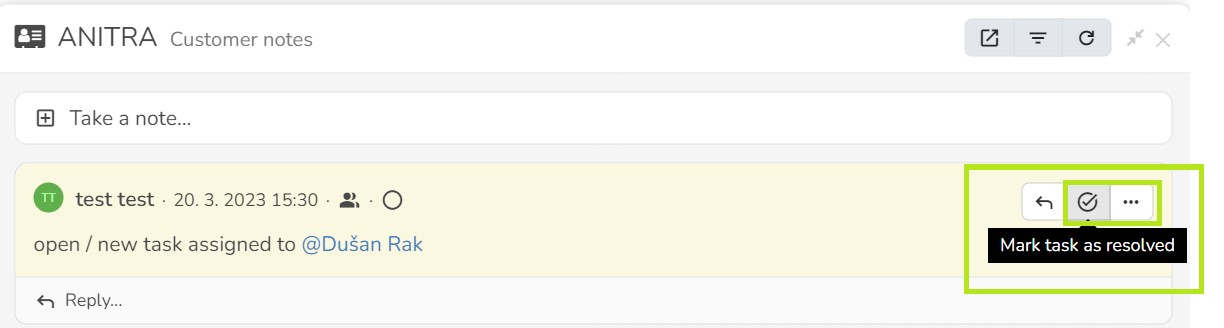
User Task board screen shows all the ToDos assigned to the user or defined by the user to others
Entity note thread can be accessed from the Task list by clicking the particular task
Task status can be changed from here or some comments added
You can also jump to the profile screen of the linked entity by clicking its name
COLUMN EDITOR: How can I adjust columns I see?
All the data visualization and download features are designed to allow users to pick and modify the columns to be used.
Use "Edit columns" options from the context menu of the functionality you wish to modify.
Beyond choosing the columns, the Edit functionality allows customizing names, order, color, graph type, and ranges, and reset changes to the default.
Edit columns option is available for
- metadata (device/tracking) lists
- metadata list exports
- profile data table columns
- profile graph columns
- data export columns
See the Graphs section for some screens of column editing
Both metadata and data can be accessed via Anitra API and same here the columns to be included can also be managed at the level of API query
[https://anitracking.com/api/| The detailed API specification] provides basic info about columns available.
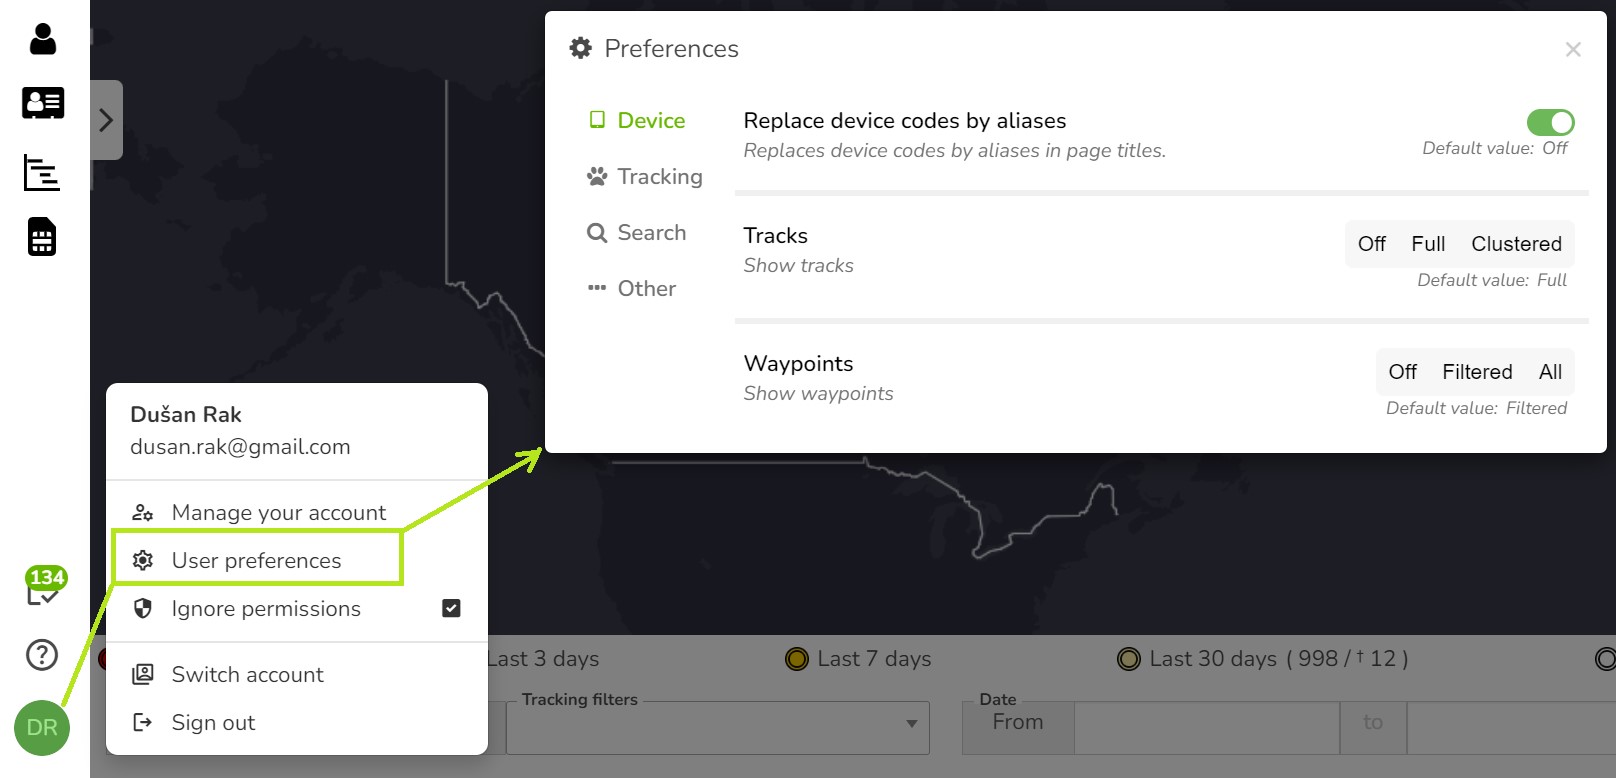
USER PREFERENCES: How can I customize my user experience ?
Various features in the application are designed to remember user modifications
You can see and manage all your user preferences in the User preferences screen
The preferences listed are organized into categories
It is accessible from the user avatar in left menu or anywhere from right click context menu